

How To Enter A Date In Excel
Microsoft Excel provides a wide range of fruitful ways to bear witness dates forth with the timestamps automatically when yous enter data. Here I'll endeavor to contain all of those simple & basic methods of automatically enter engagement when data entered with proper illustrations.
Download Practise Workbook
Download the workbook here that we've used to prepare this commodity. Yous tin use it as a calculator likewise as we've embedded the output cells with formulas.
7 Like shooting fish in a barrel Techniques to Make Excel Automatically Enter Date When Data Entered
one. Using Keyboard Shortcuts
To get today'due south date & current timestamp nosotros can use keyboard shortcuts directly.
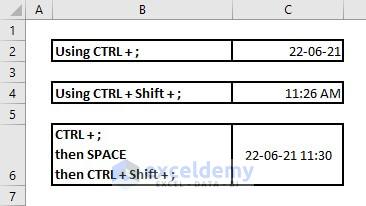
In any cell where you desire to know today's date, press CTRL + ; (Control + Semi-colon).
Employ CTRL + Shift + ; to enter the electric current time automatically.
If you desire to enter both in a prison cell, then press CTRL + ; 1st, then SPACE & finally CTRL + SHIFT + ;. Yous'll get the date & timestamp together.
2. Using the TODAY Part
Excel has a default function to input today's date.
Like in the picture below, blazon =TODAY() in a cell, printing Enter & y'all'll see today's appointment there at once.

3. Using the Now Part
The NOW function adds a timestamp forth with the date like the picture below.

four. Combining IF & NOW Functions (Timestamps)
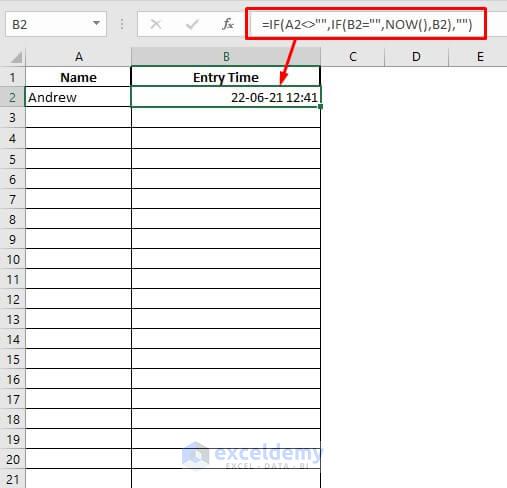
Now, let's assume that we want the entry fourth dimension of each employee in an part & the employees will input their entrance timestamps by entering their names only in a spreadsheet column everyday. Another column next to it will evidence automatically their entry timestamps along with the dates when they enter their names in the first column.
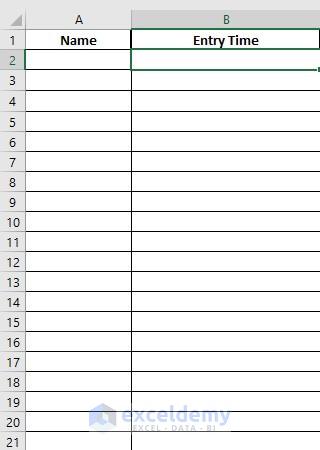
How shall we do this?
Pace 1:
➤ Select Cell B2 & type =IF(A2<>"",IF(B2="",At present(),B2),"")
🔎 Short Explanation of the Office:
This is the base of operations formula for the Timestamp part. What's happening here is we're commanding Excel that If Cell A2 remains empty, the Cell B2 volition be empty too. And when an input data will be entered in Cell A2, then Cell B2 will show the timestamp at in one case. The whole thing will exist executed by the combination of 2 simple functions- IF & Now. Nosotros'll use IF to enter the status & Now function will evidence the time when data entered.

Step 2:
➤ Indicate your mouse cursor onto the right bottom corner of the Cell B2 & you'll see a '+' icon at that place which is called Fill Handle.
➤ Click on it and drag downwards to the terminal cell you demand for information entry in Cavalcade B & release the mouse push button.
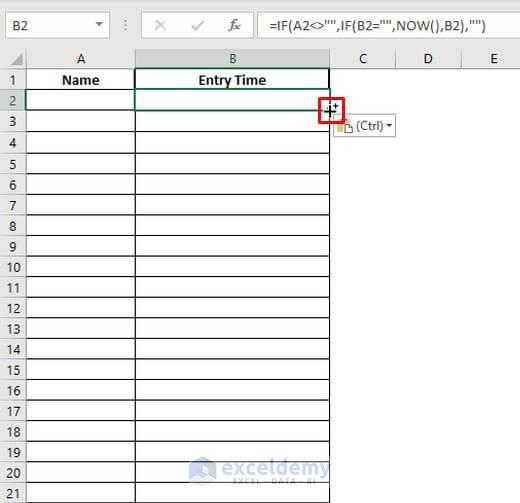
And so now the whole Column B is prepared for showing timestamps along with the dates equally you take just copied the unabridged column by using Fill Handle.

Step 3:
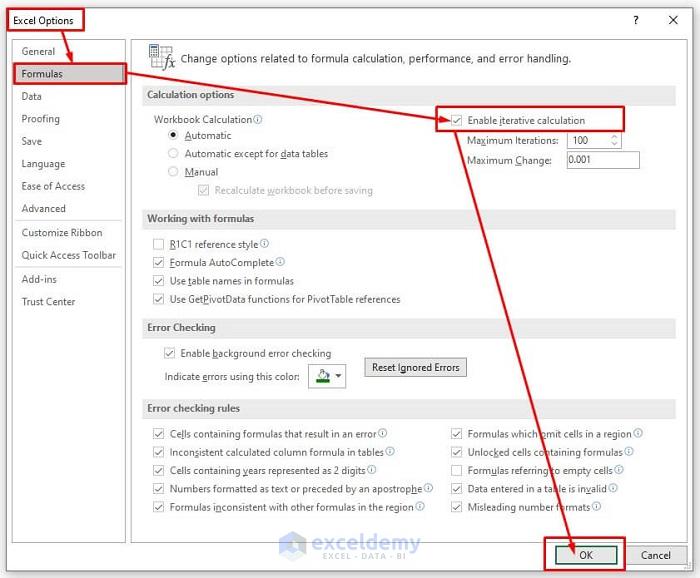
➤ Now become to File ribbon & choose Excel Options.
➤ Select the Formulas tab & marker the Enable Iterative Adding.
➤ Click on OK.
🔎 What we're doing here is telling Excel that any cell in Column B may need to refer itself in the function during data entry in Column A to execute the function. And if nosotros don't enable this iterative adding from Excel options so an fault message prompt volition be shown during data entry.
Pace 4:
➤ Now enter a proper noun in Cell A2 & printing Enter.
Yous'll see the appointment & timestamp right away in Cell B2.
In Cell A3, put another name & the perspective result volition be shown correct to it in Jail cell B3.
Thus you can enter any name or data in Column A and y'all'll get to know the appointment & timestamps adjacent to them.

5. Using Autofill Option with Multiple Criteria
If yous need to input dates according to the chronological lodge then the Autofill pick will arrange all-time. In the movie below, you have to use Fill up Handle in Jail cell B4 to drag information technology to B13. From the drib-downward in the corner, you'll find multiple criteria.
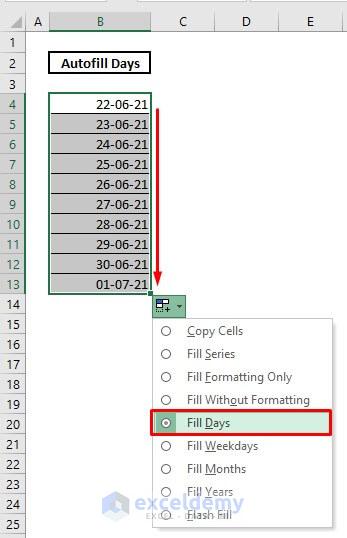
If y'all choose Make full Weekdays, and then the dates will exist shown in a chronological club except weekends(Sabbatum & Sun).

You lot tin can as well see months only in a progressive guild if you select Make full Months.
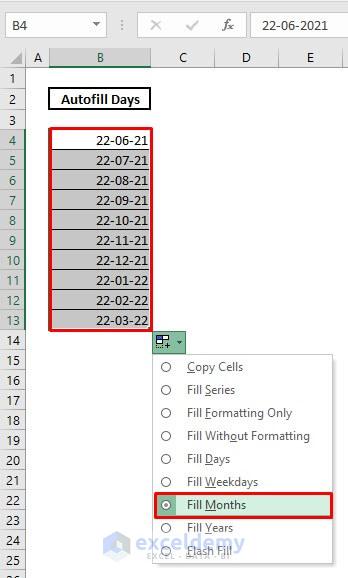
And the same way, go for Make full Years to come across years in sequential order.

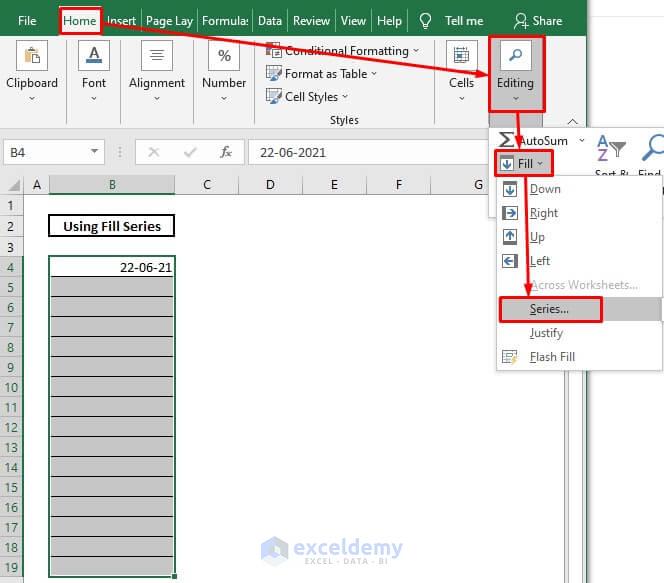
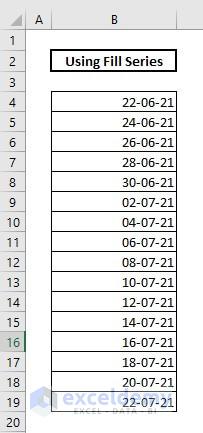
6. Using Fill Series Control to Customize Autofill Option
You tin utilize the Fill Series option too if you demand to customize dates more than including intervals.
Step 1:
➤ Select the whole column or a range of cells in a cavalcade where you lot desire to input dates.
➤ Under the Home tab, select the Editing group of commands.
➤ From the Make full drop-downward, choose the Series choice.
A box will appear to let you customize dates according to your criteria.
Footstep 2:
➤ In the Series box, select Series in as Columns, Type as Date & Engagement unit every bit Day.
➤ Type '2' as the Step Value, this is called mutual difference in an arithmetics progression or series.
➤ Printing Enter.

Now this is the resultant series of dates with 2 days of common difference.
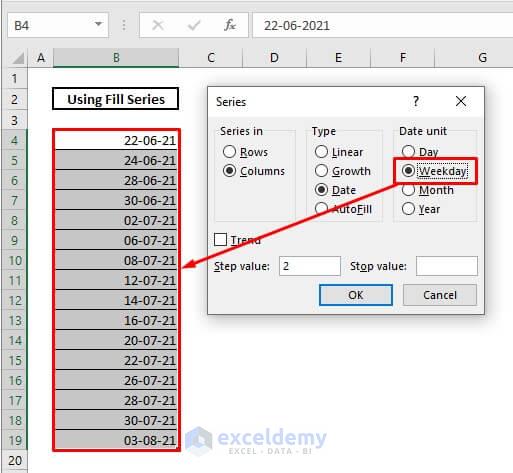
Now if yous cull Weekday as Appointment Unit from the Series box, then the dates volition exclude the weekends(Sat & Lord's day).
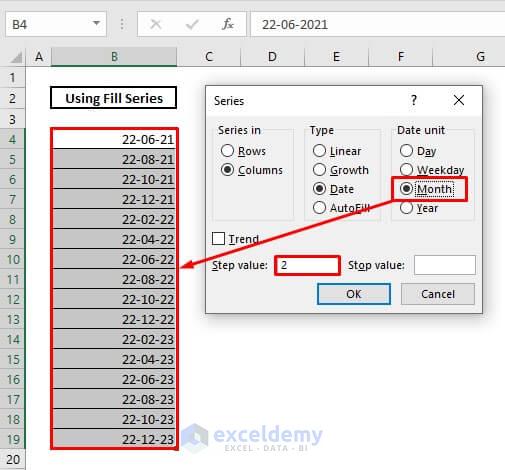
Select Month as Engagement Unit and you'll be shown a serial of months with 2 months as common deviation or interval between two months.
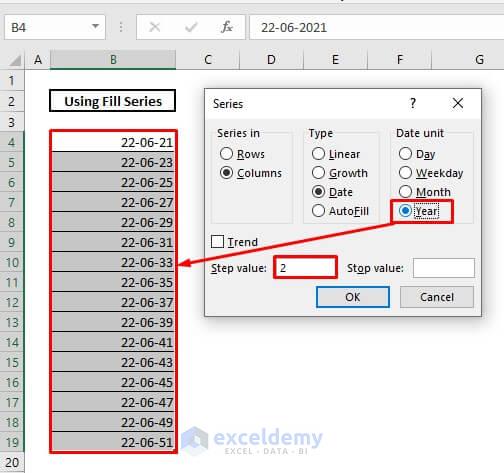
Similarly, you can exercise this for years too by selecting Yr as Date Unit.
7. Embedding VBA Commands to Brand Excel Office
And at present here's the last method where you tin utilize your ain customized function by formatting it with VBA coding showtime. We're going to know the Entry Time of the employees once once again here but this fourth dimension with our own role.
Pace 1:
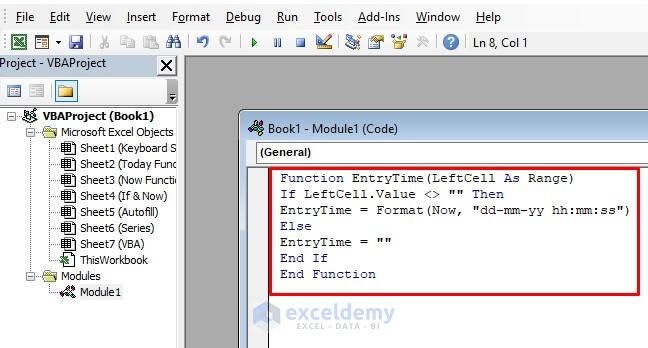
➤ Press Alt+F11 & VBA window will announced like in the picture beneath.
➤ From the Insert tab, select Module command & now you lot're ready to brand your own formula by coding.

Step 2:
➤ Copy the following codes & paste them into your lawmaking module.
Part EntryTime(LeftCell As Range) If LeftCell.Value <> "" Then EntryTime = Format(Now, "dd-mm-yy hh:mm:ss") Else EntryTime = "" End If End Function ➤ At present printing Alt+F11 again to shut the VBA window or just return to your Excel datasheet.
Step 3:
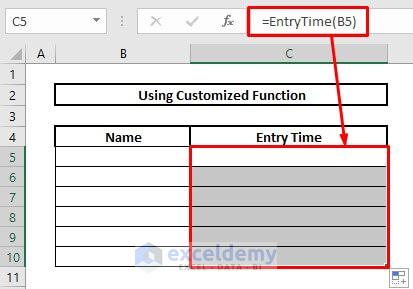
➤ Select Prison cell C5 & type =EntryTime(B5) as EntryTime is the new part we've just built with VBScript.
➤ Apply Make full Handle once again to copy the formula upwards to Cell C10 or more according to your need.
Step iv:
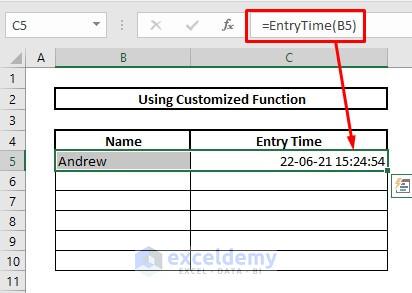
➤ Put a name in Cell B5.
➤ Press Enter & you're washed.
You'll get the Entry Fourth dimension instantly in Cell C5.
Decision
So these are all basic, easy & useful techniques you tin follow to make Excel enter dates equally well as timestamps automatically when information entered. I hope, you've constitute these methods quite effective. If you got whatever questions or feedback regarding this article you tin comment. You lot can too have a glance at our other interesting & informative articles on this website.
Further Readings
- How to Combine Date and Time in One Jail cell in Excel (iv Methods)
- How to Insert Appointment in Excel (7 Simple Methods)
- How to Change Dates Automatically Using Formula in Excel
- How to Insert Dates in Excel Automatically (iii Simple Tricks)
- How to auto populate date in Excel when cell is updated

Source: https://www.exceldemy.com/excel-automatically-enter-date-when-data-entered/
Posted by: cooperevines1973.blogspot.com
0 Response to "How To Enter A Date In Excel"
Post a Comment